How to forge a Japanese Knife with Nobuya Hayashi
A one-day knife making workshop in Shikoku, Japan
During our travels through Shikoku Island in southern Japan, we arranged a one-day knife-making class at Kurogane, a small blacksmith workshop run by Nobuya Hayashi. Kurogane workshop lies in the depths of the Japanese countryside on the banks of the Shimanto River in Kochi prefecture. Surrounded by forest, blooming cherry trees and a 20 min car ride away from the next train station, it is a perfect get-away from the busy Japanese city life. 20 years ago Nobuya-san came here for that same reason. He escaped the hectic capital of Shikoku in search of the calm essence of country life. It was then that he was approached by his late Master Mitsunori Okada-san, who offered to teach him the craft of iron making and old-style forging. They both lived and worked together until his master passed away in 2011. Nobuya-san has since taken over, making traditional Tamahagane steel and forging kitchen knives for customers in and out of Japan. A few months ago, Jesse Cunningham joined him as an apprentice to continue the art of traditional Japanese Ironmaking.
Kurogane is one of few places in Japan that offer short workshops on blacksmithing in English. It is also one of the last places to make Tamahagane steel from iron sand and forge traditional Japanese Knives from it. While we only attended the one-day knife-making workshop, you can join longer courses in making your own Tamahagane Knives from iron sand.
Before the Workshop: Preparing the laminated steel
Traditional Japanese kitchen knives are made from laminated carbon steel. This “lamination” is basically a sandwich of hard high-carbon steel between two layers of soft low-carbon steel. This technique evolved over the years and is beneficial in a few ways. primarily it saves large amounts of the precious high-carbon steel which is much harder to find and make. It also makes the knife more shock absorbent and gives it an extended lifespan. The hardness of high-carbon steel holds a sharp edge longer, but also makes it more brittle, which can cause chips or breaks. The lamination process provides protection through the flexible low-carbon steel on the outside. A laminated knife is also easier to sharpen, as most of the area in contact with a wet stone is soft steel.
To make this steel sandwich, the three layers (soft-hard-soft) are forged-welded together. It's quite a tricky and labor-intensive process, and luckily for us, Nobuya-san had prepared the steel in advance.
Step 1: Cutting a Steel blank
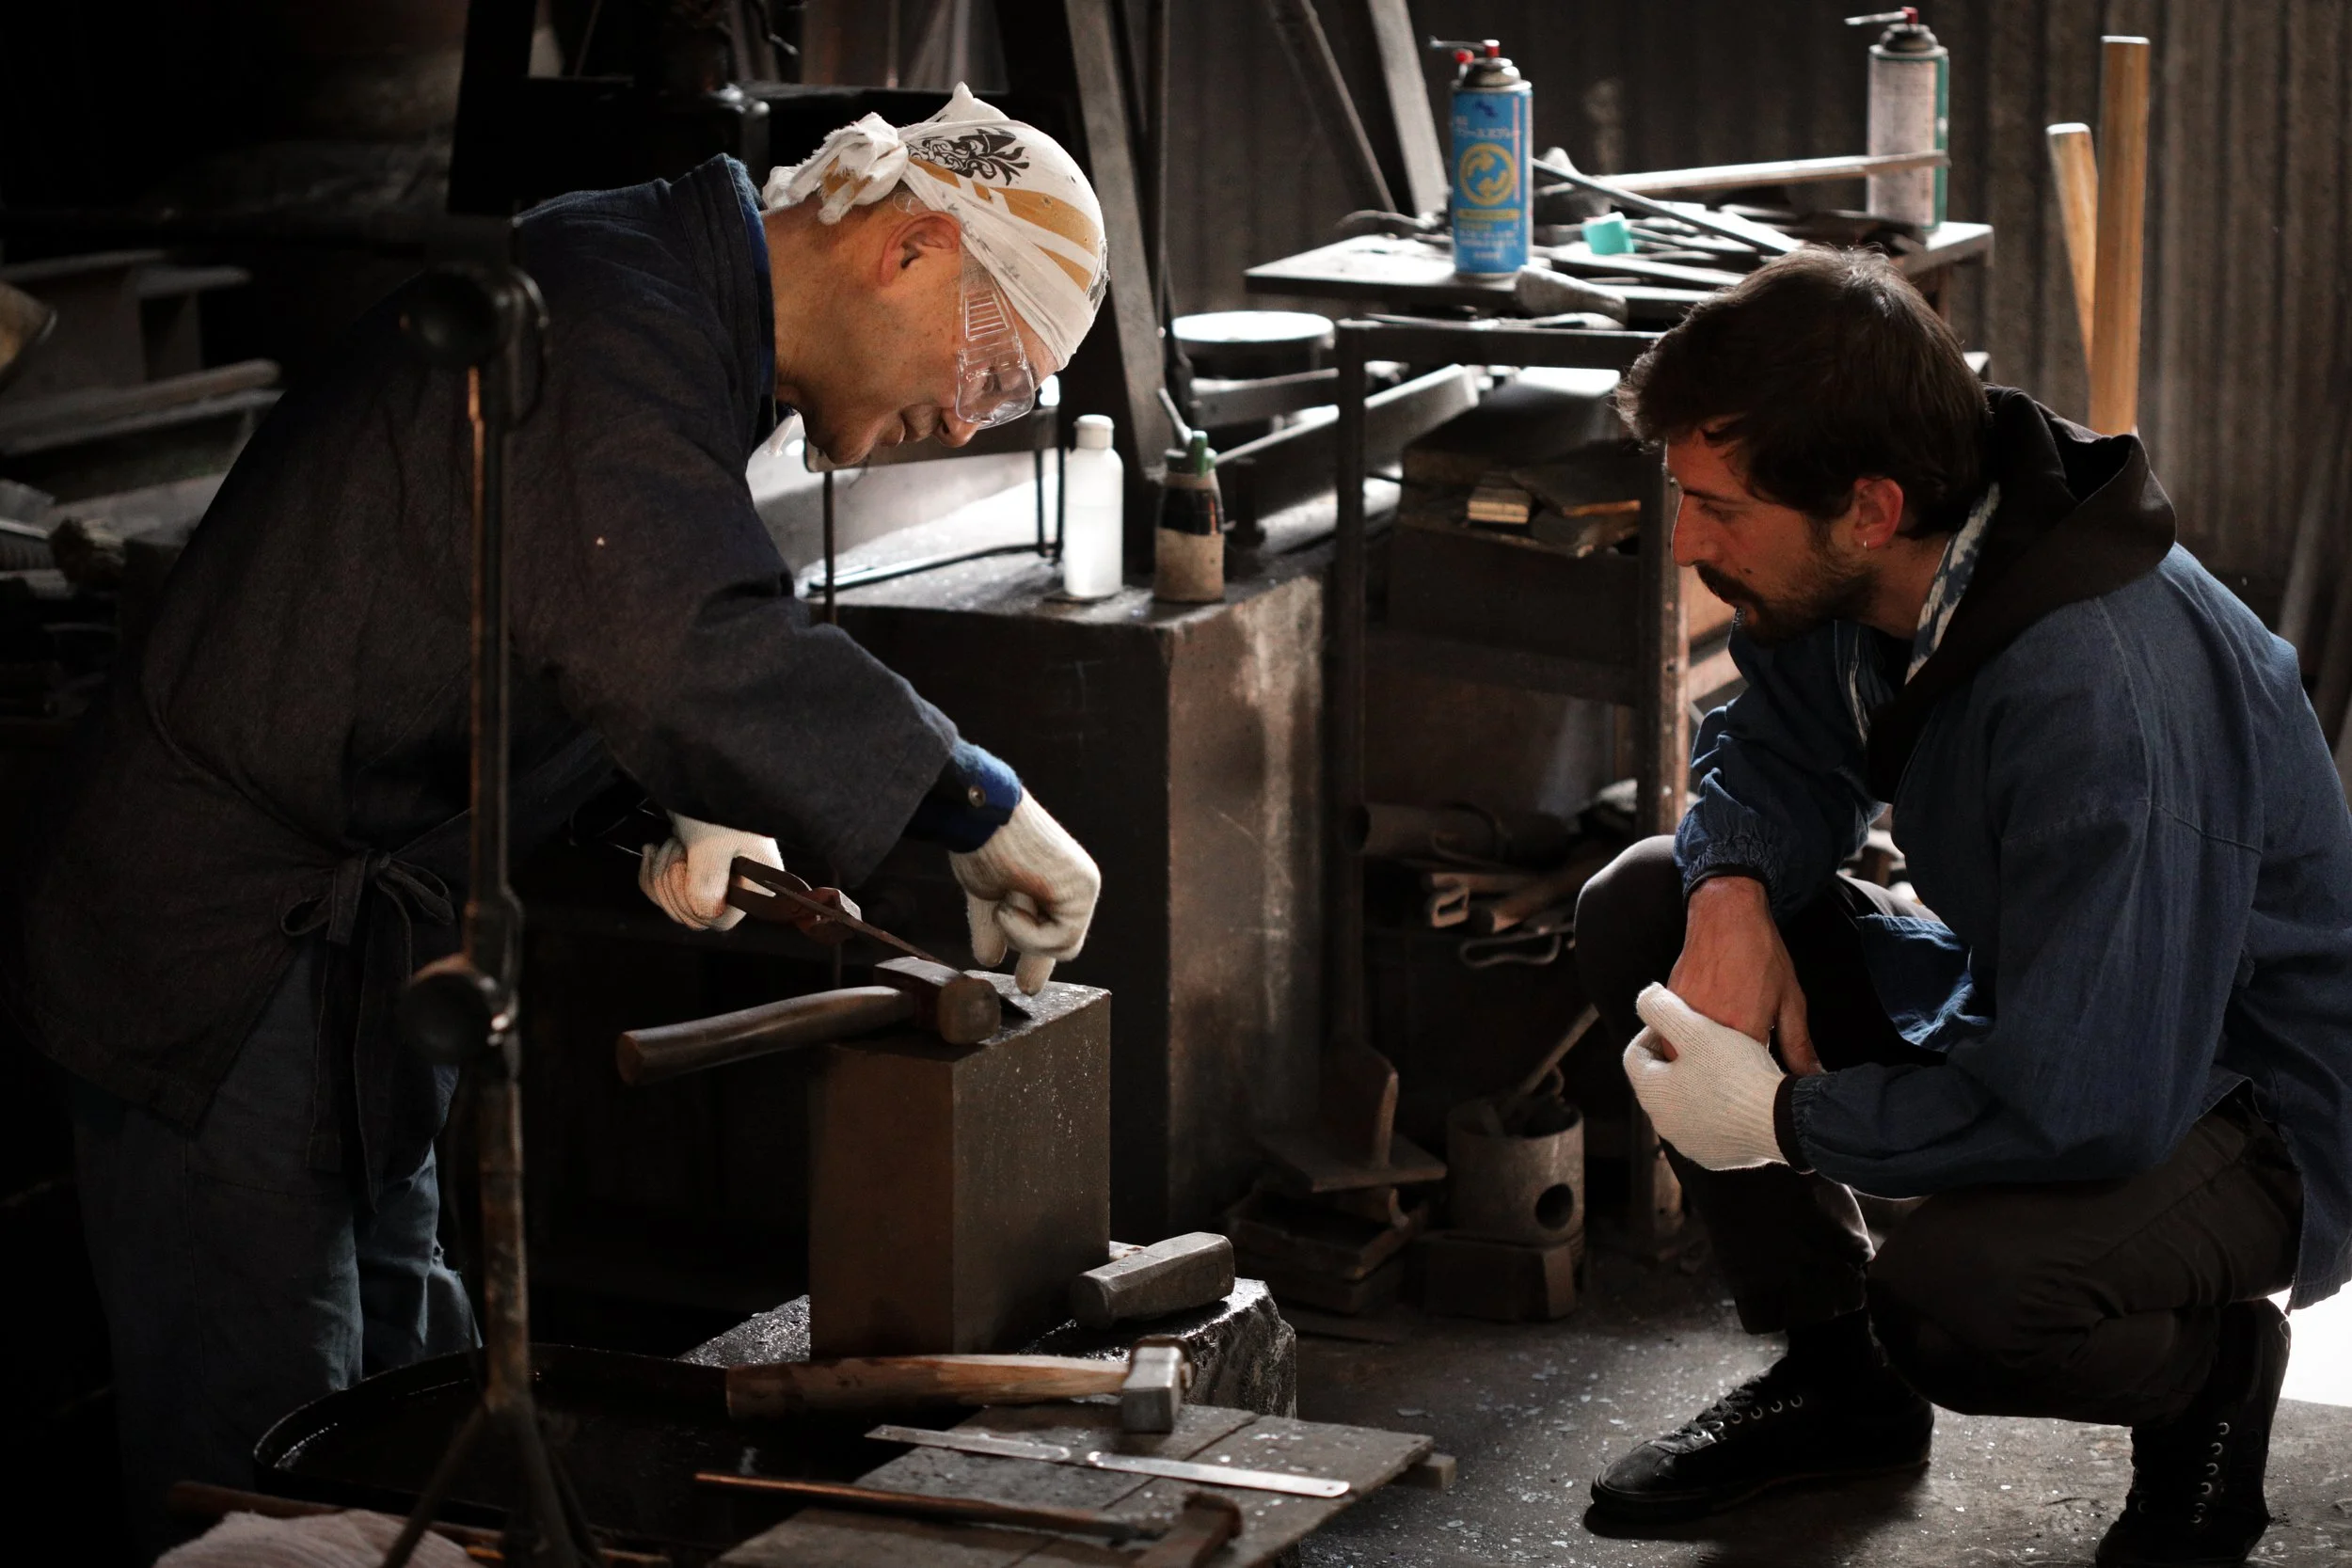
With the pre-laminated steel bar ready, our hand-forging journey began with cutting a piece to fit the knife we wanted to make. Ido’s Gyuto knife was forged from a bar of laminated Blue Steel #2, and my Usuba from laminated White Steel. As this was an old school environment even the cutting was done by heat and hammer and not with electrical tools. Nobuya san got the forge started and from there on it was just us, the flames and the steel. The bars were heated, and a piece was “cut” off by placing a sharp-edged tool on the steel and hitting it with a hammer. It's important to be able to gauge how much steel you actually need. Nobuya's experience has taught him this and he held the cutting tool while we, each in his turn, did the heavy striking with the hammer.
Step 2: Stretching the Steel
To mould and shape the steel, you have to heat it up. Anywhere between 900-1200C is good. The hotter the material, the softer it gets and the easier it is to stretch. You need to be careful though, if you overheat the material you can accidentally melt your blade away. The temperature is checked by observing the color of the heated steel, a light orange to yellow is what you are looking for. Once hot, the piece is quickly moved to the anvil and beaten into shape. It is essential to work quickly here, as the metal cools down quickly.
We started stretching and flattening the steel in pairs of two, redirecting mass in both directions. Typically, the Master would hit the blade first with a small hammer, pointing at the right spot. The apprentice would follow with a hit with a heavier hammer to stretch the steel. It was important for the anvil to be covered in water before the first hit, as this would cause a small explosion that would remove all the “dirt” that might be on the anvil or blank. This method of cleaning will prevent any dirt from being forged into the blade steel. Rather loud and scary, this was still a really cool and efficient trick to observe.
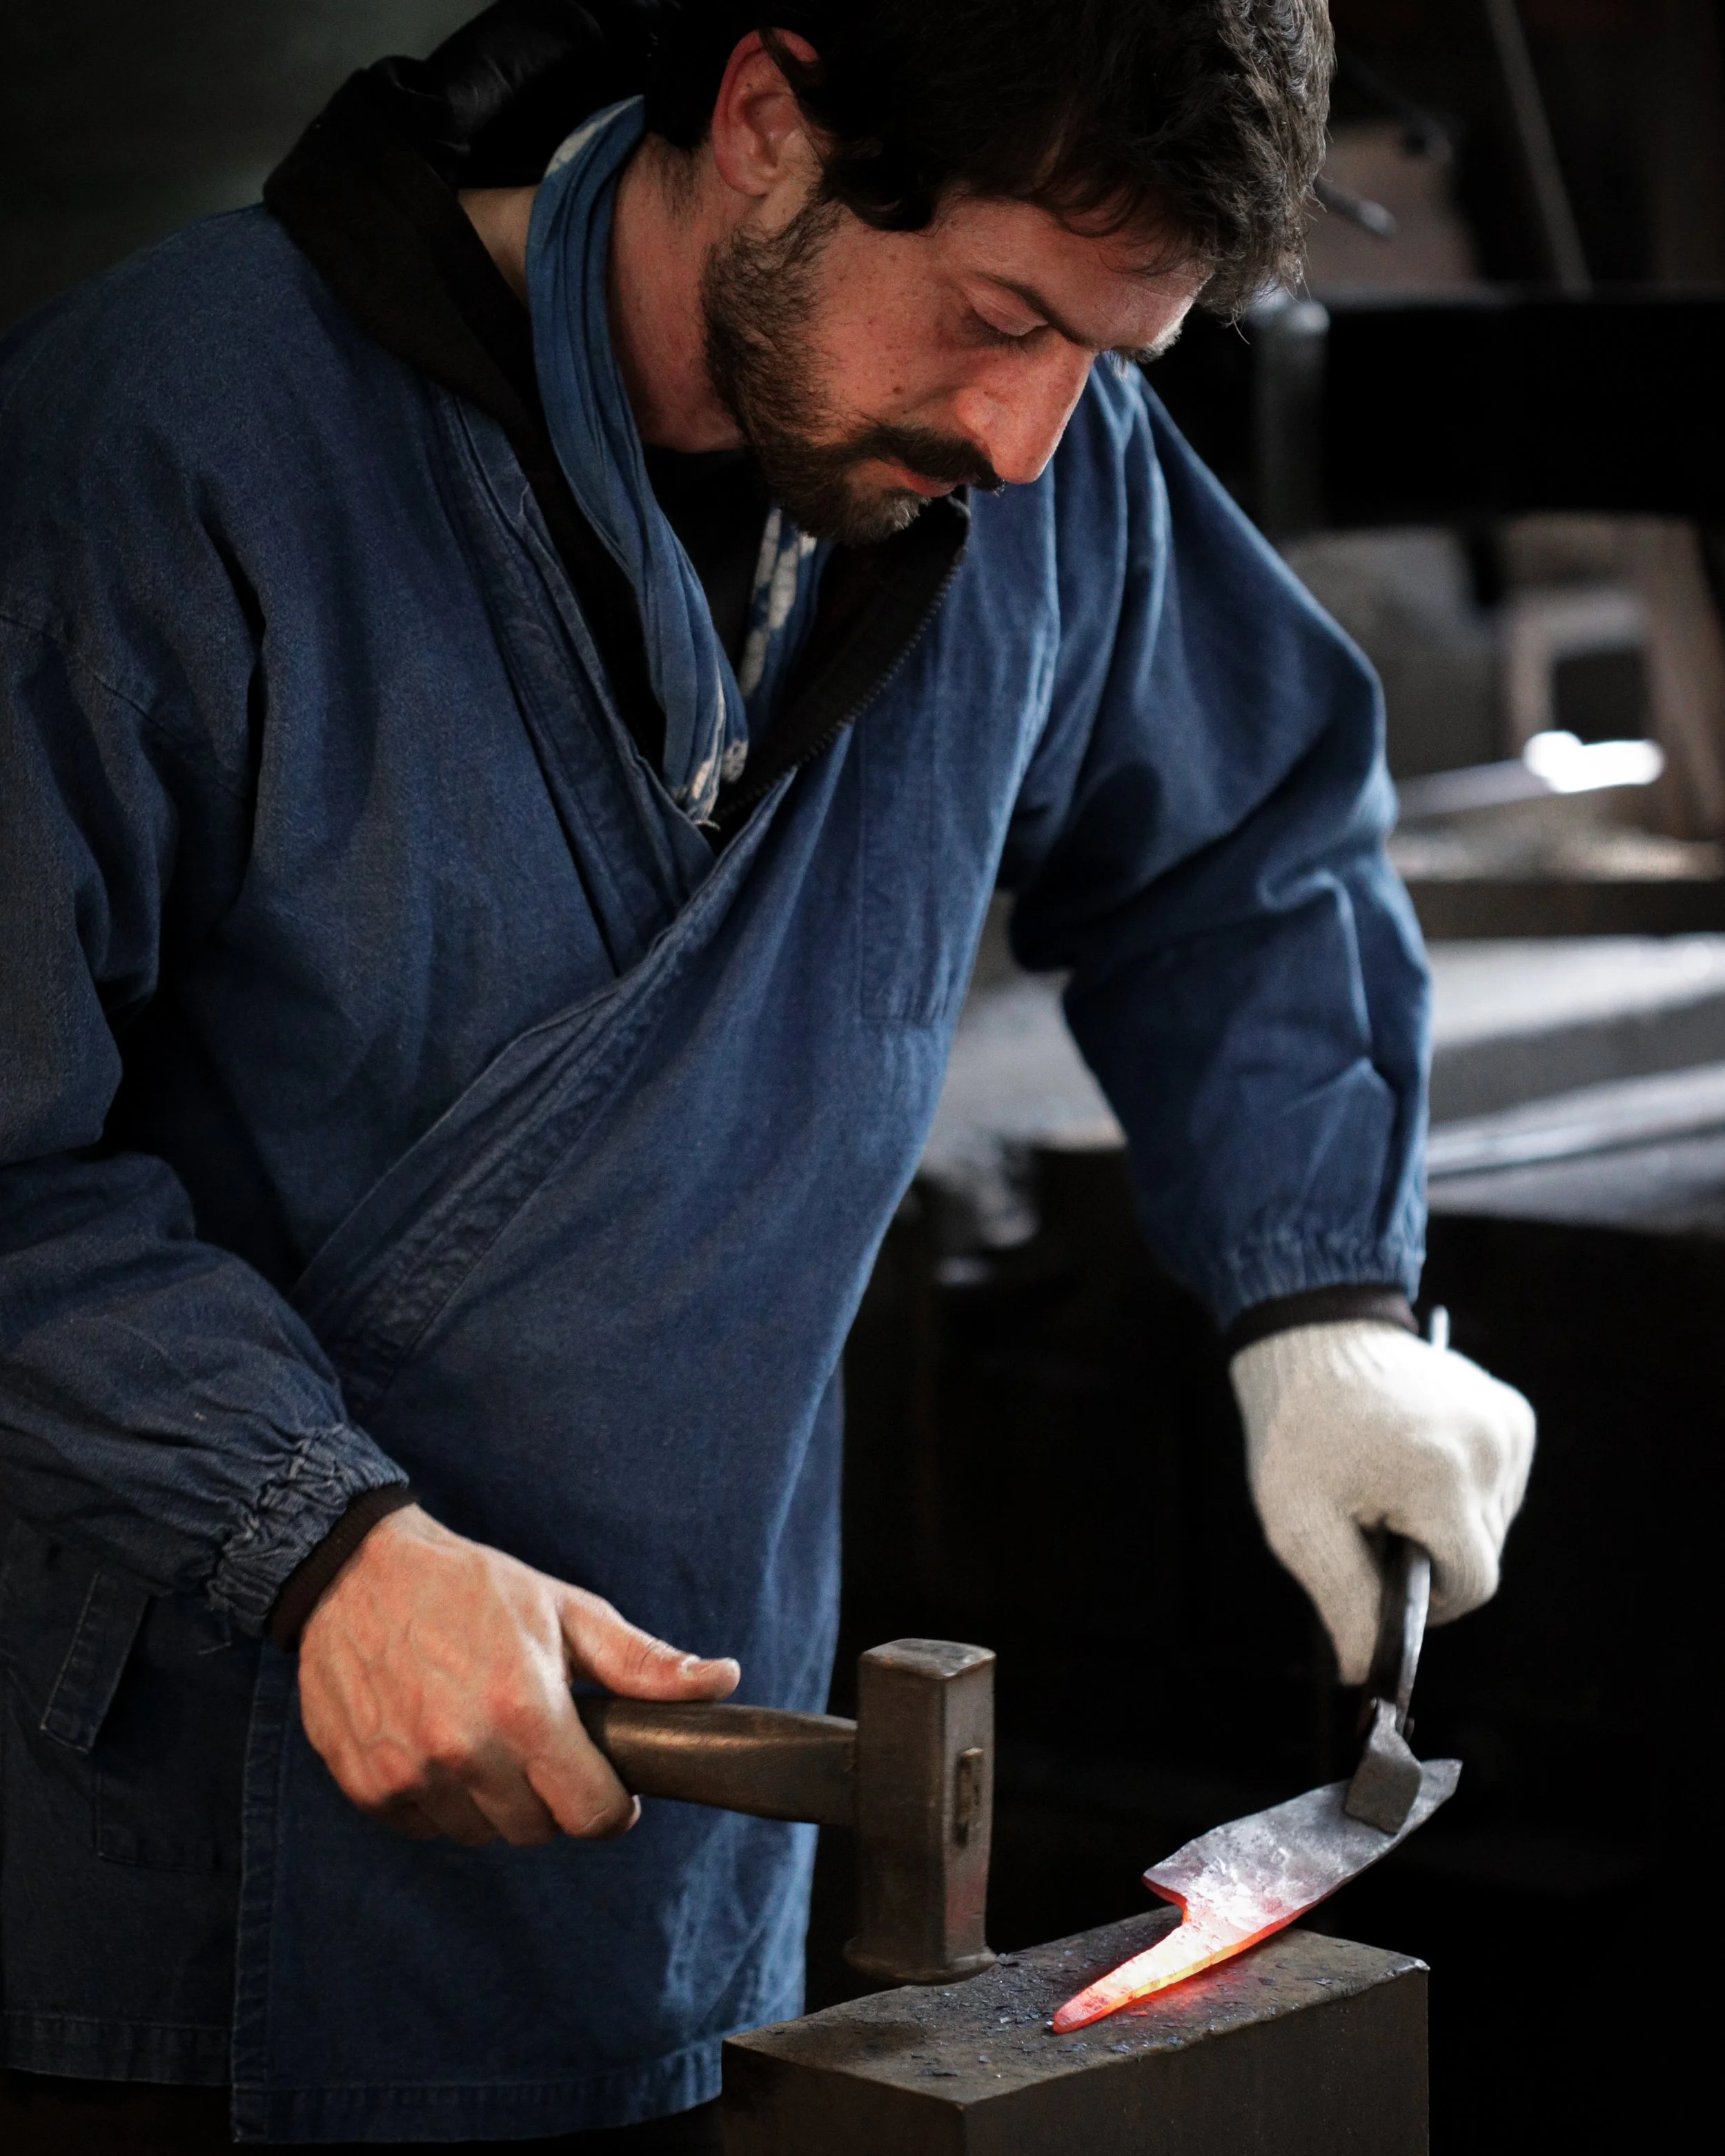
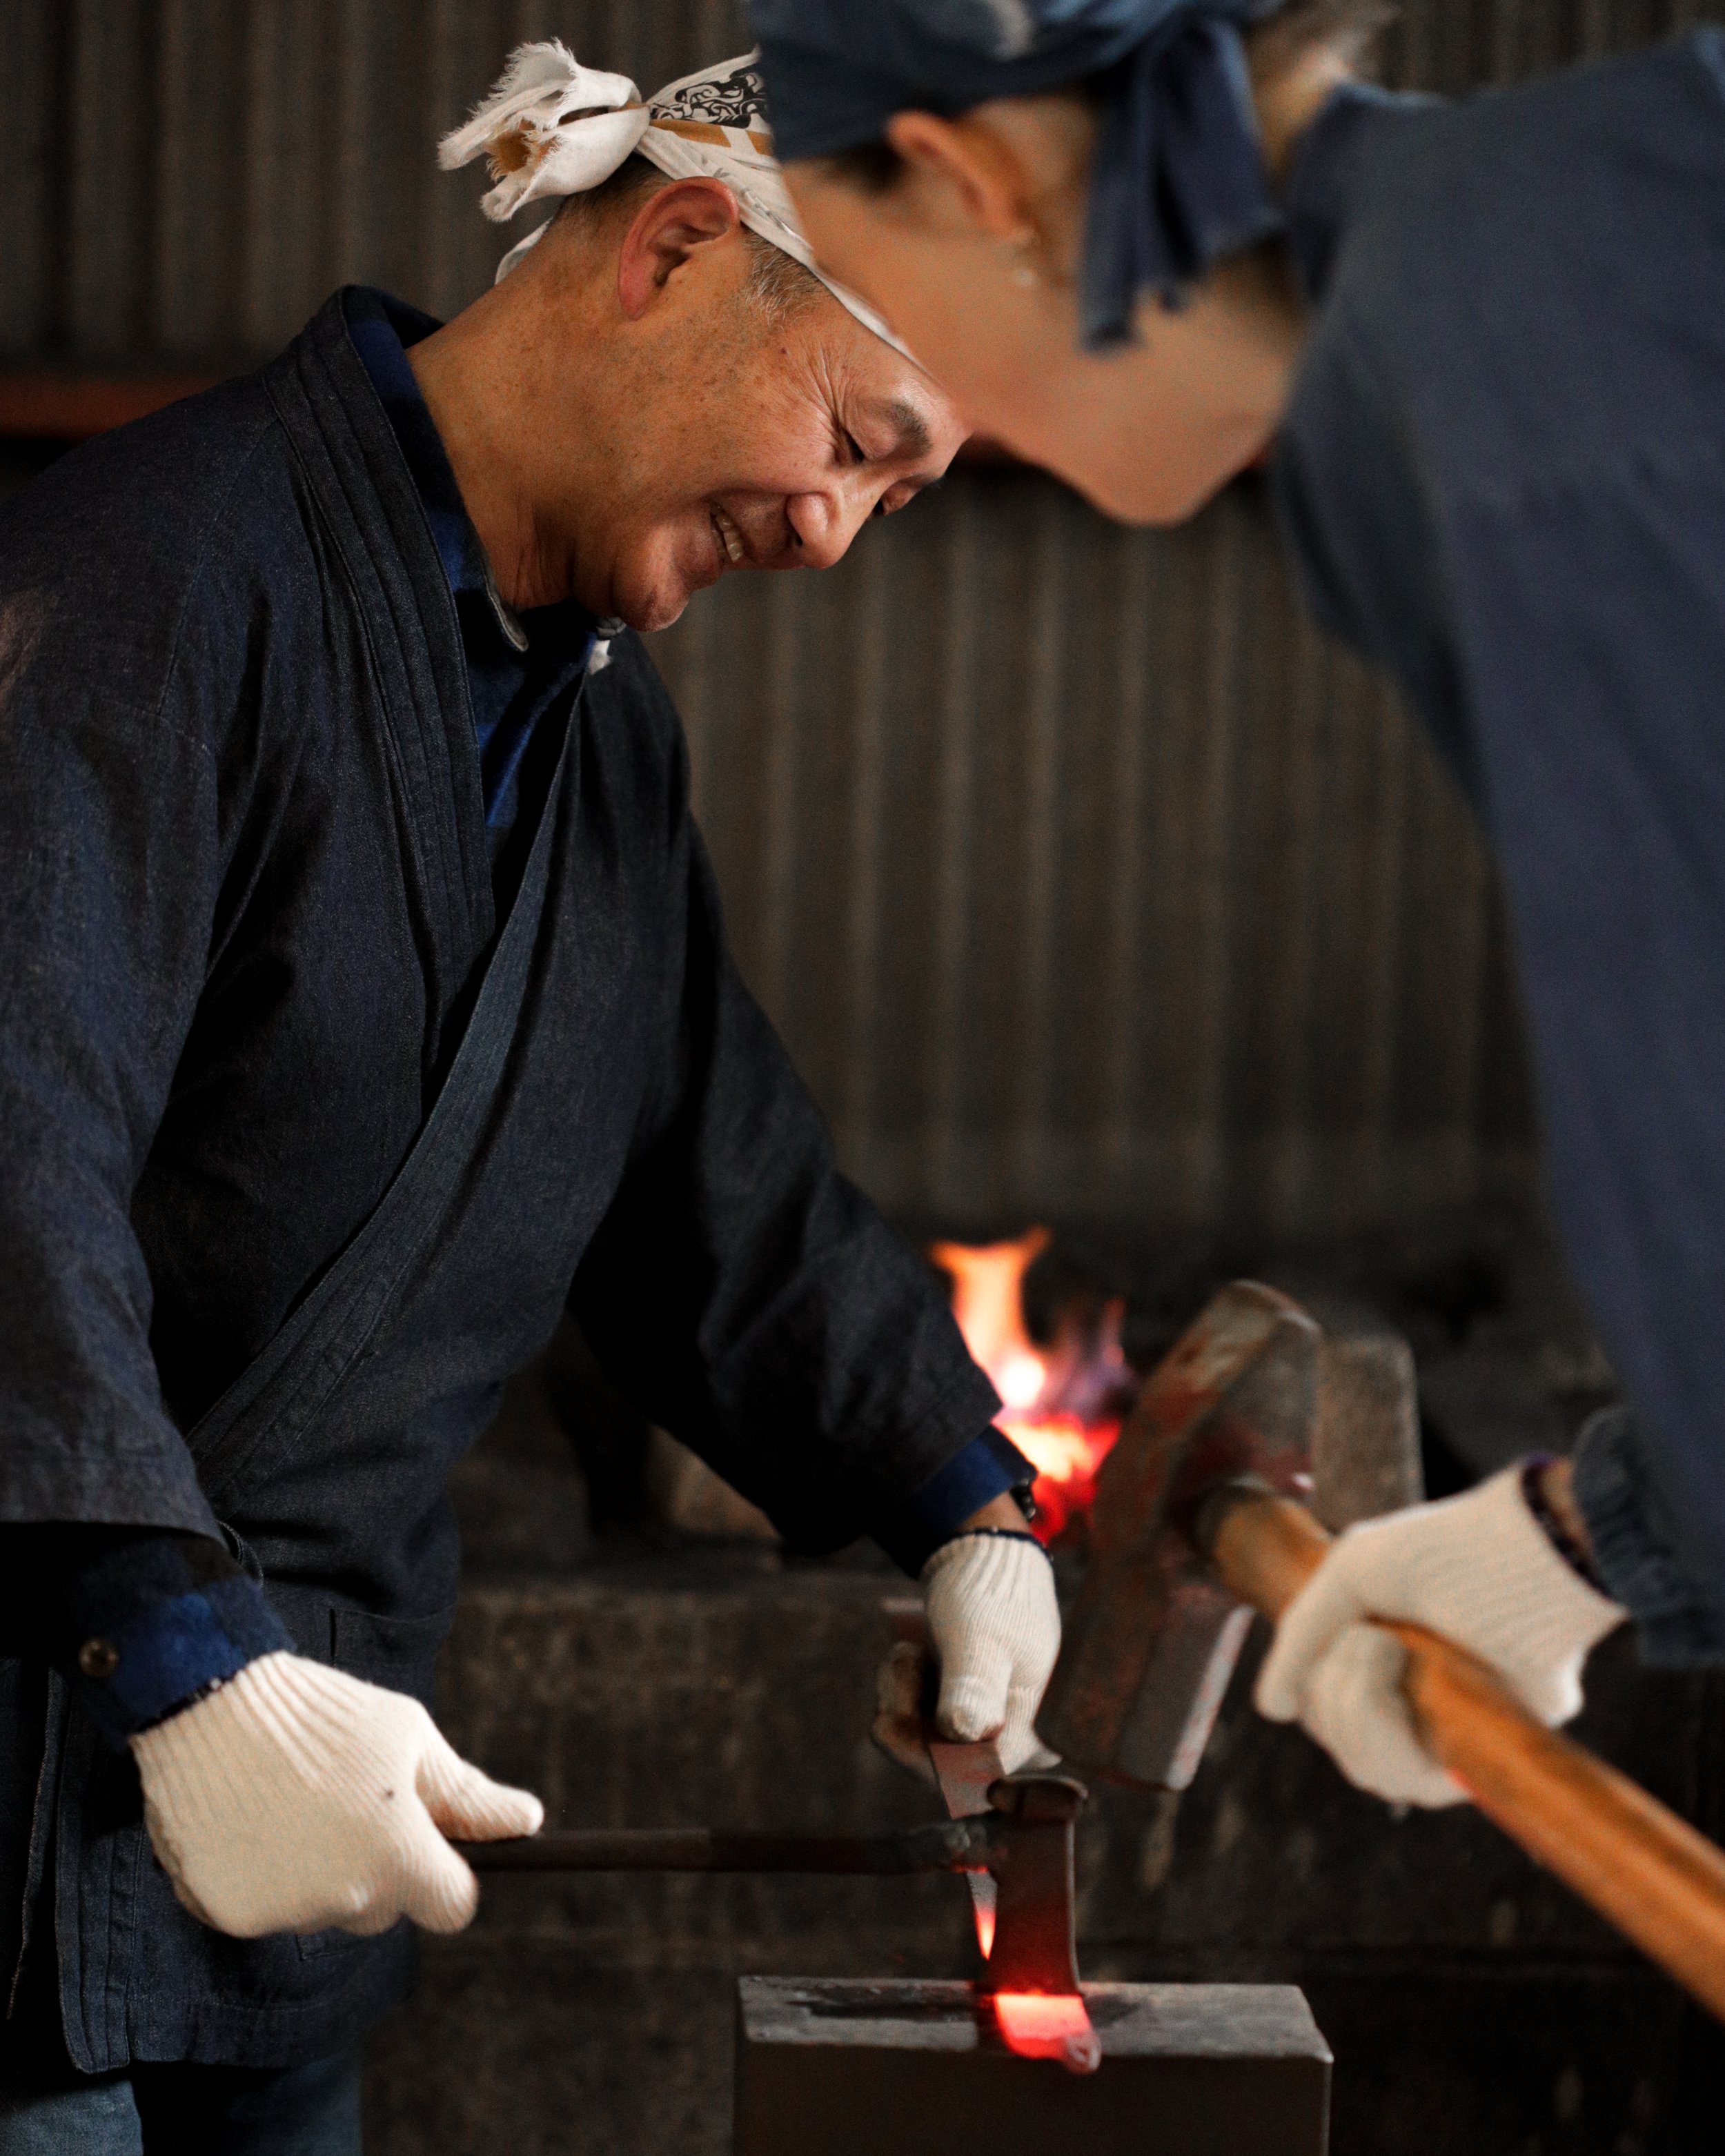
Step 3: Forging the Knife
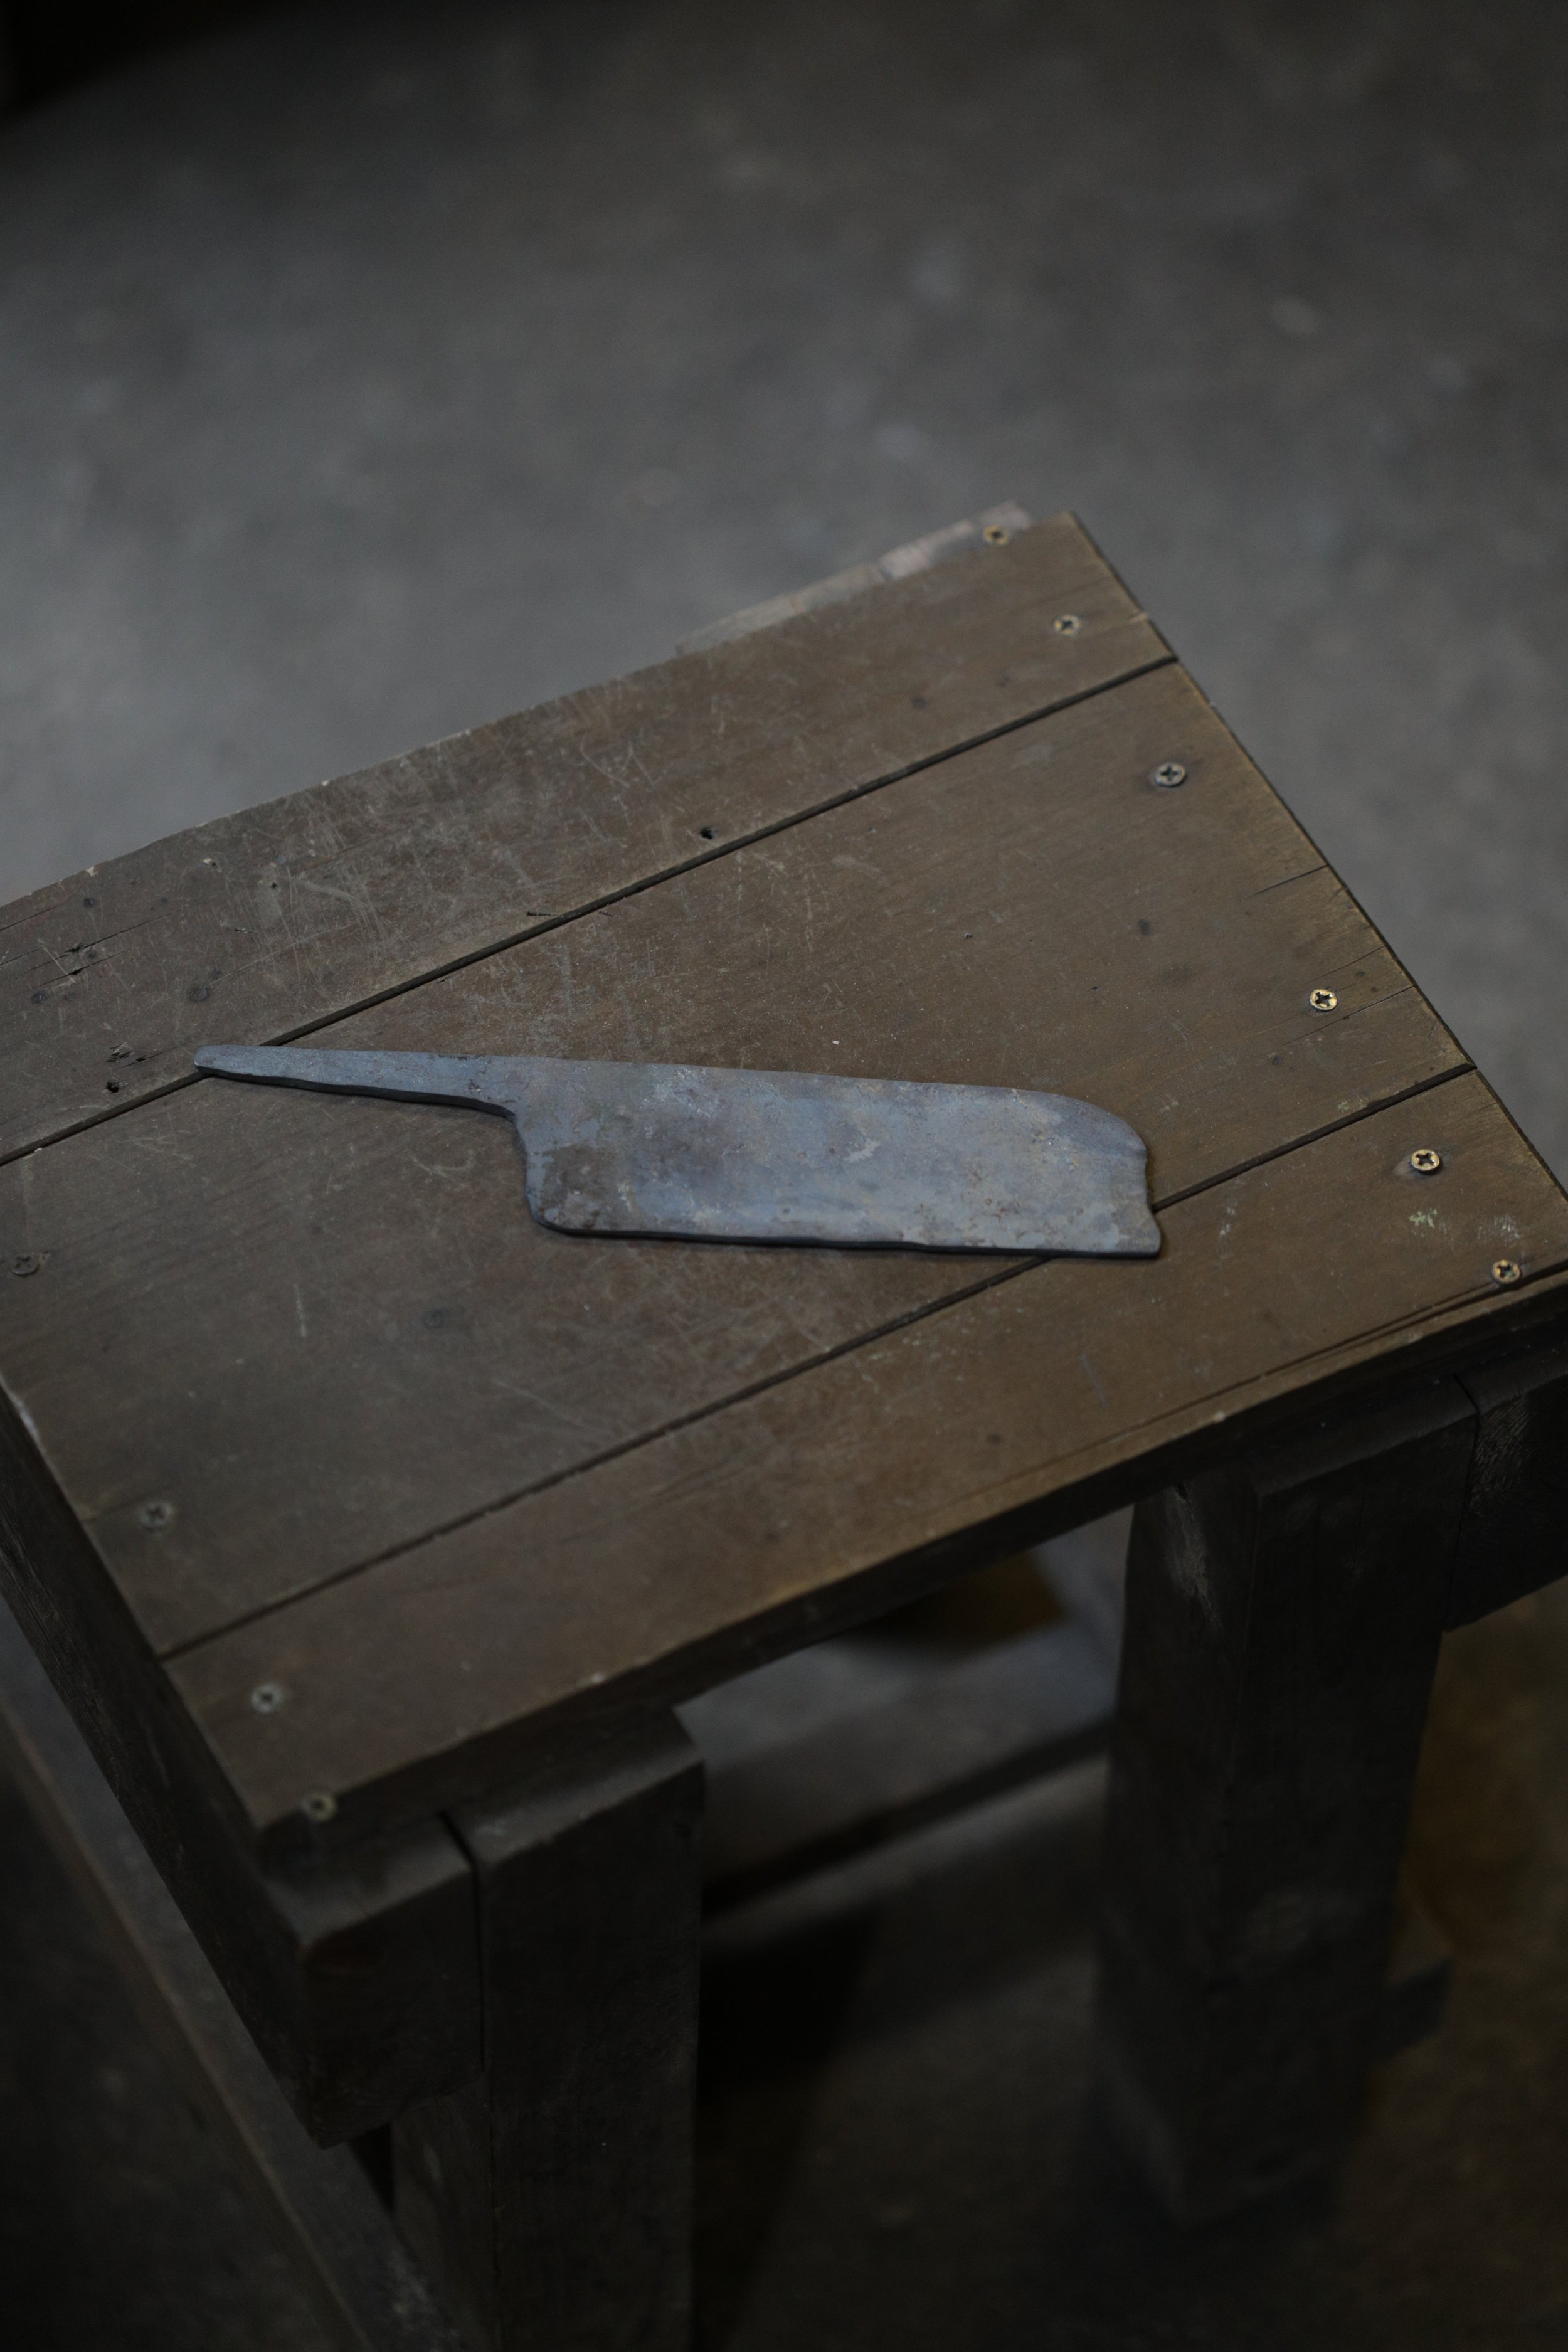
After the main stretching was done we started working with a smaller hammer and tongs by ourselves. We heated our blanks in a charcoal forge to the point where the color of the steel had turned orange. Then removed the steel with the tongs, placed it on the wet anvil, and hammered the blank into the shape of our knives, focusing on tapering both sides and creating a straight edge. We also shaped out the tang that would be fitted in the handle and hammered out any uneven surfaces or kinks. After this forging process, the blades were put aside to cool down naturally.
Step 4: Grinding & Shaping the Blade
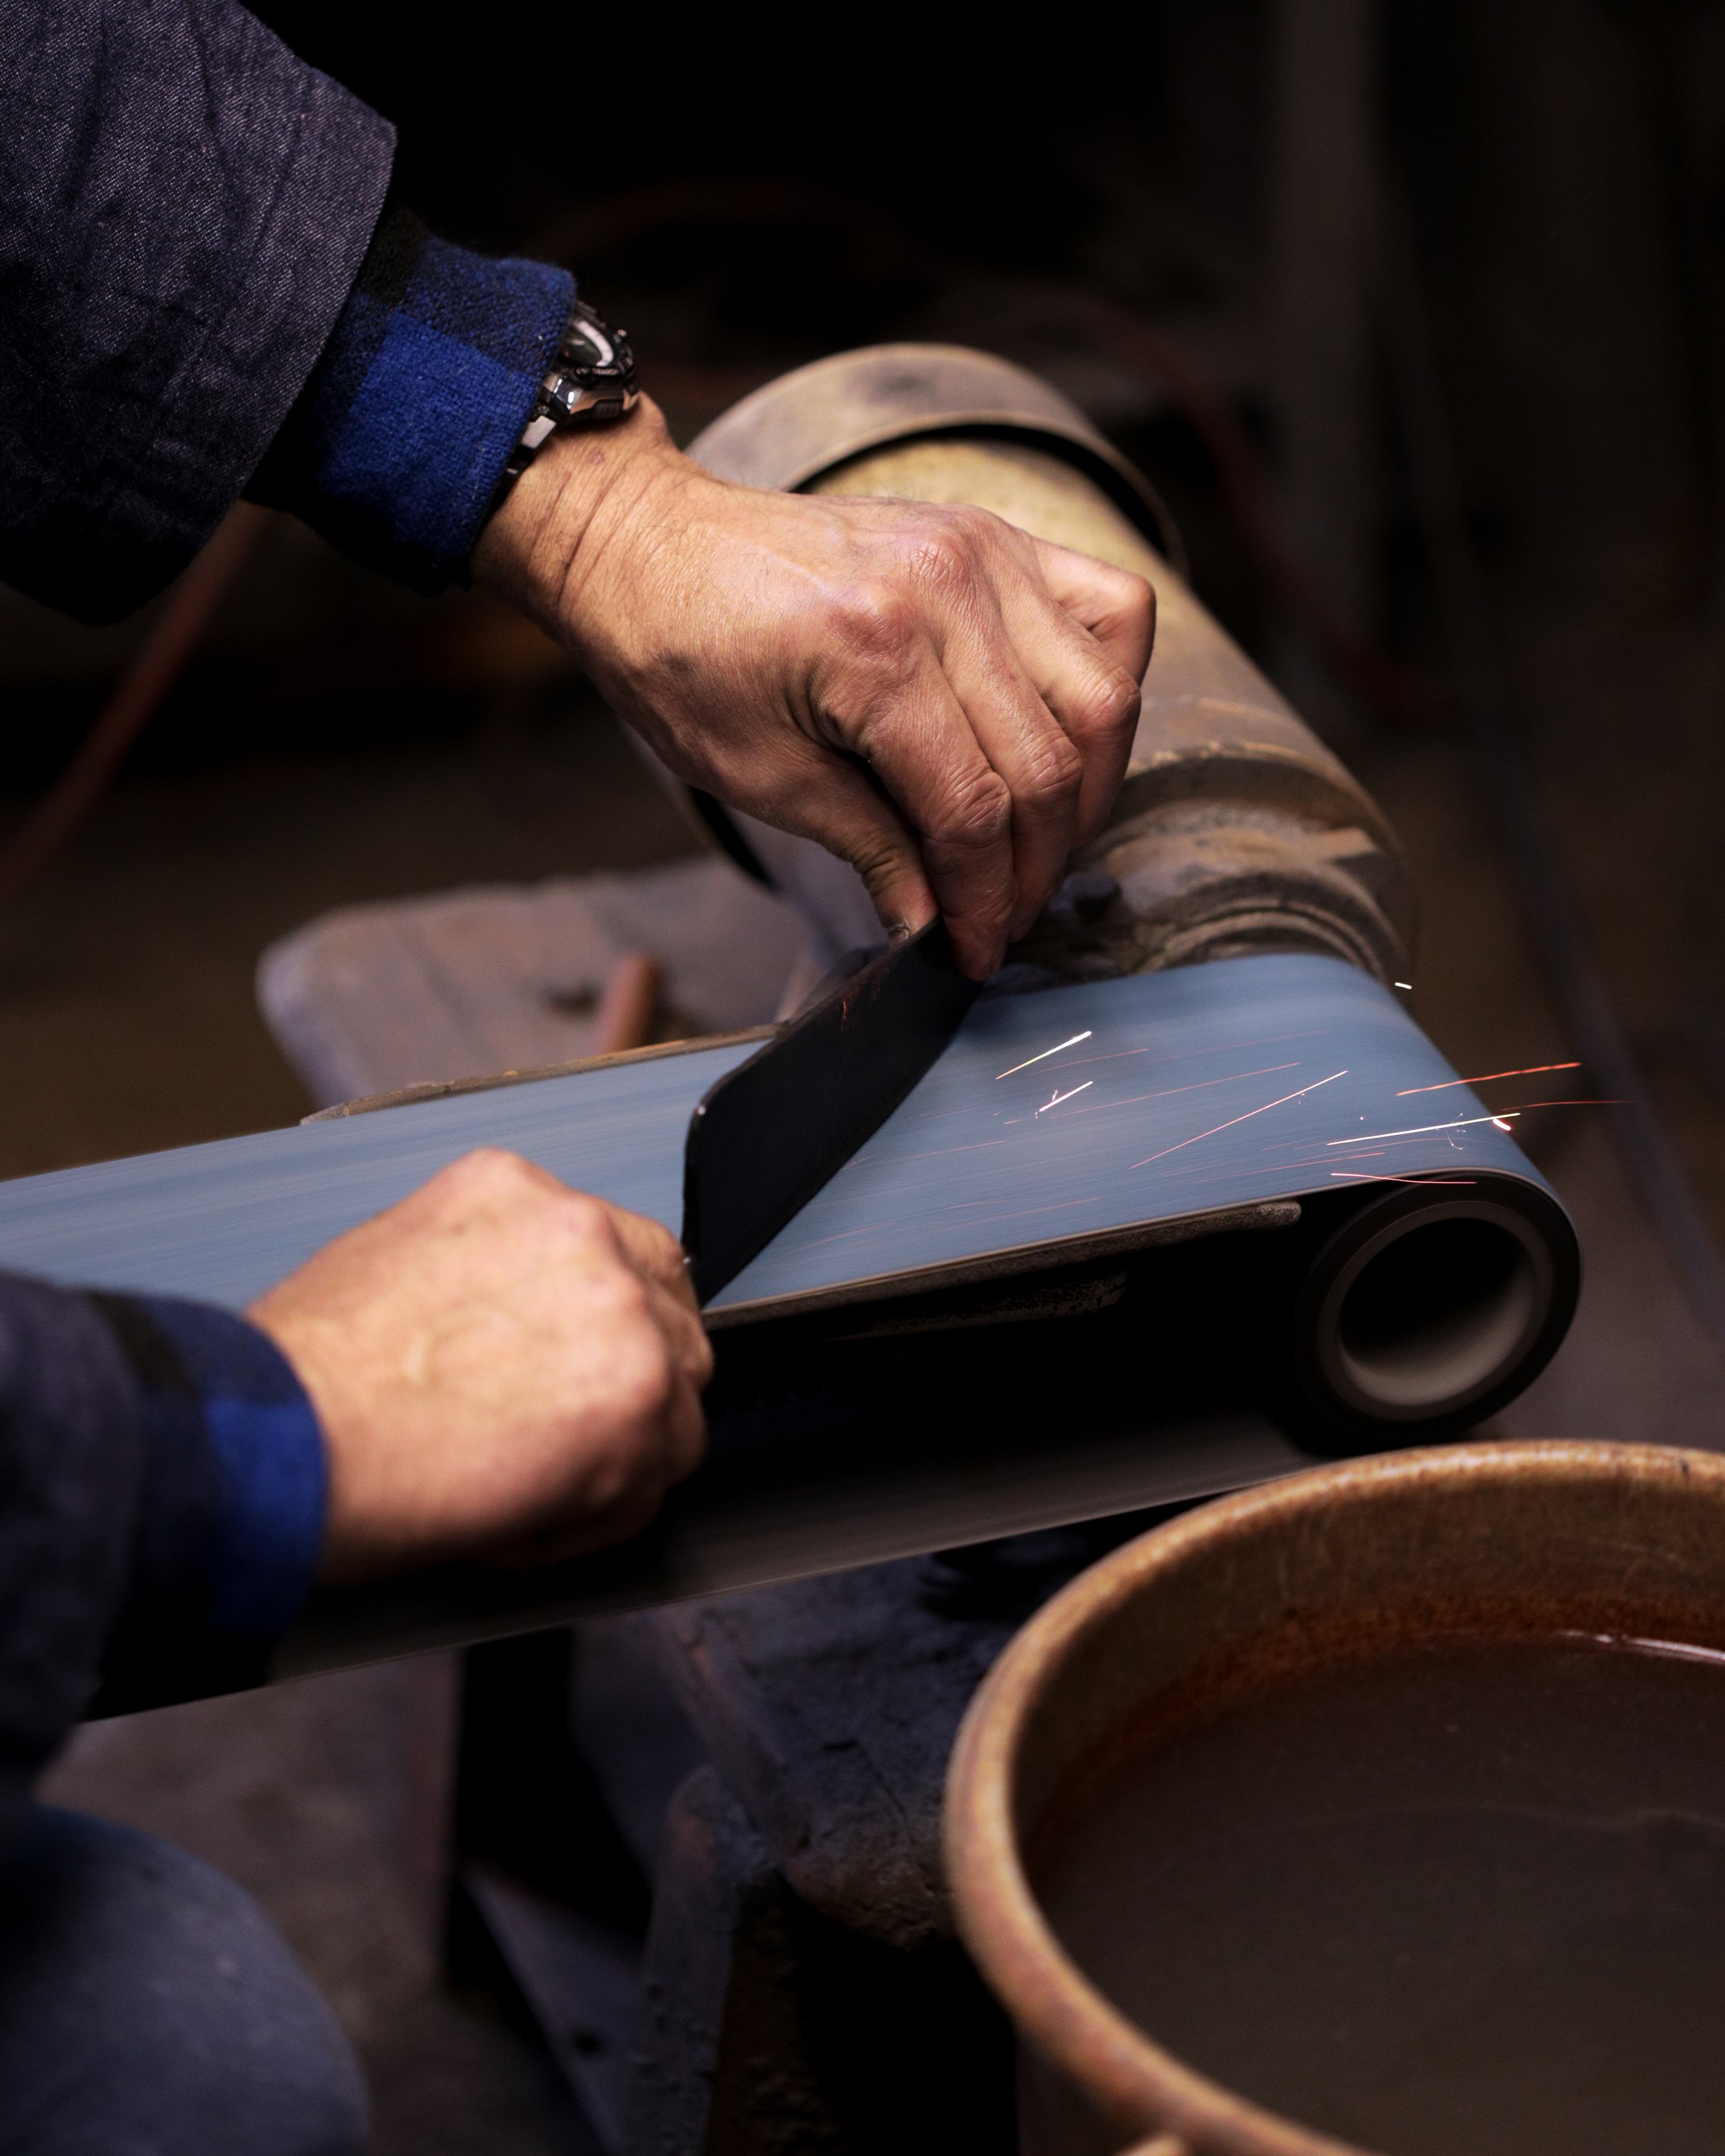
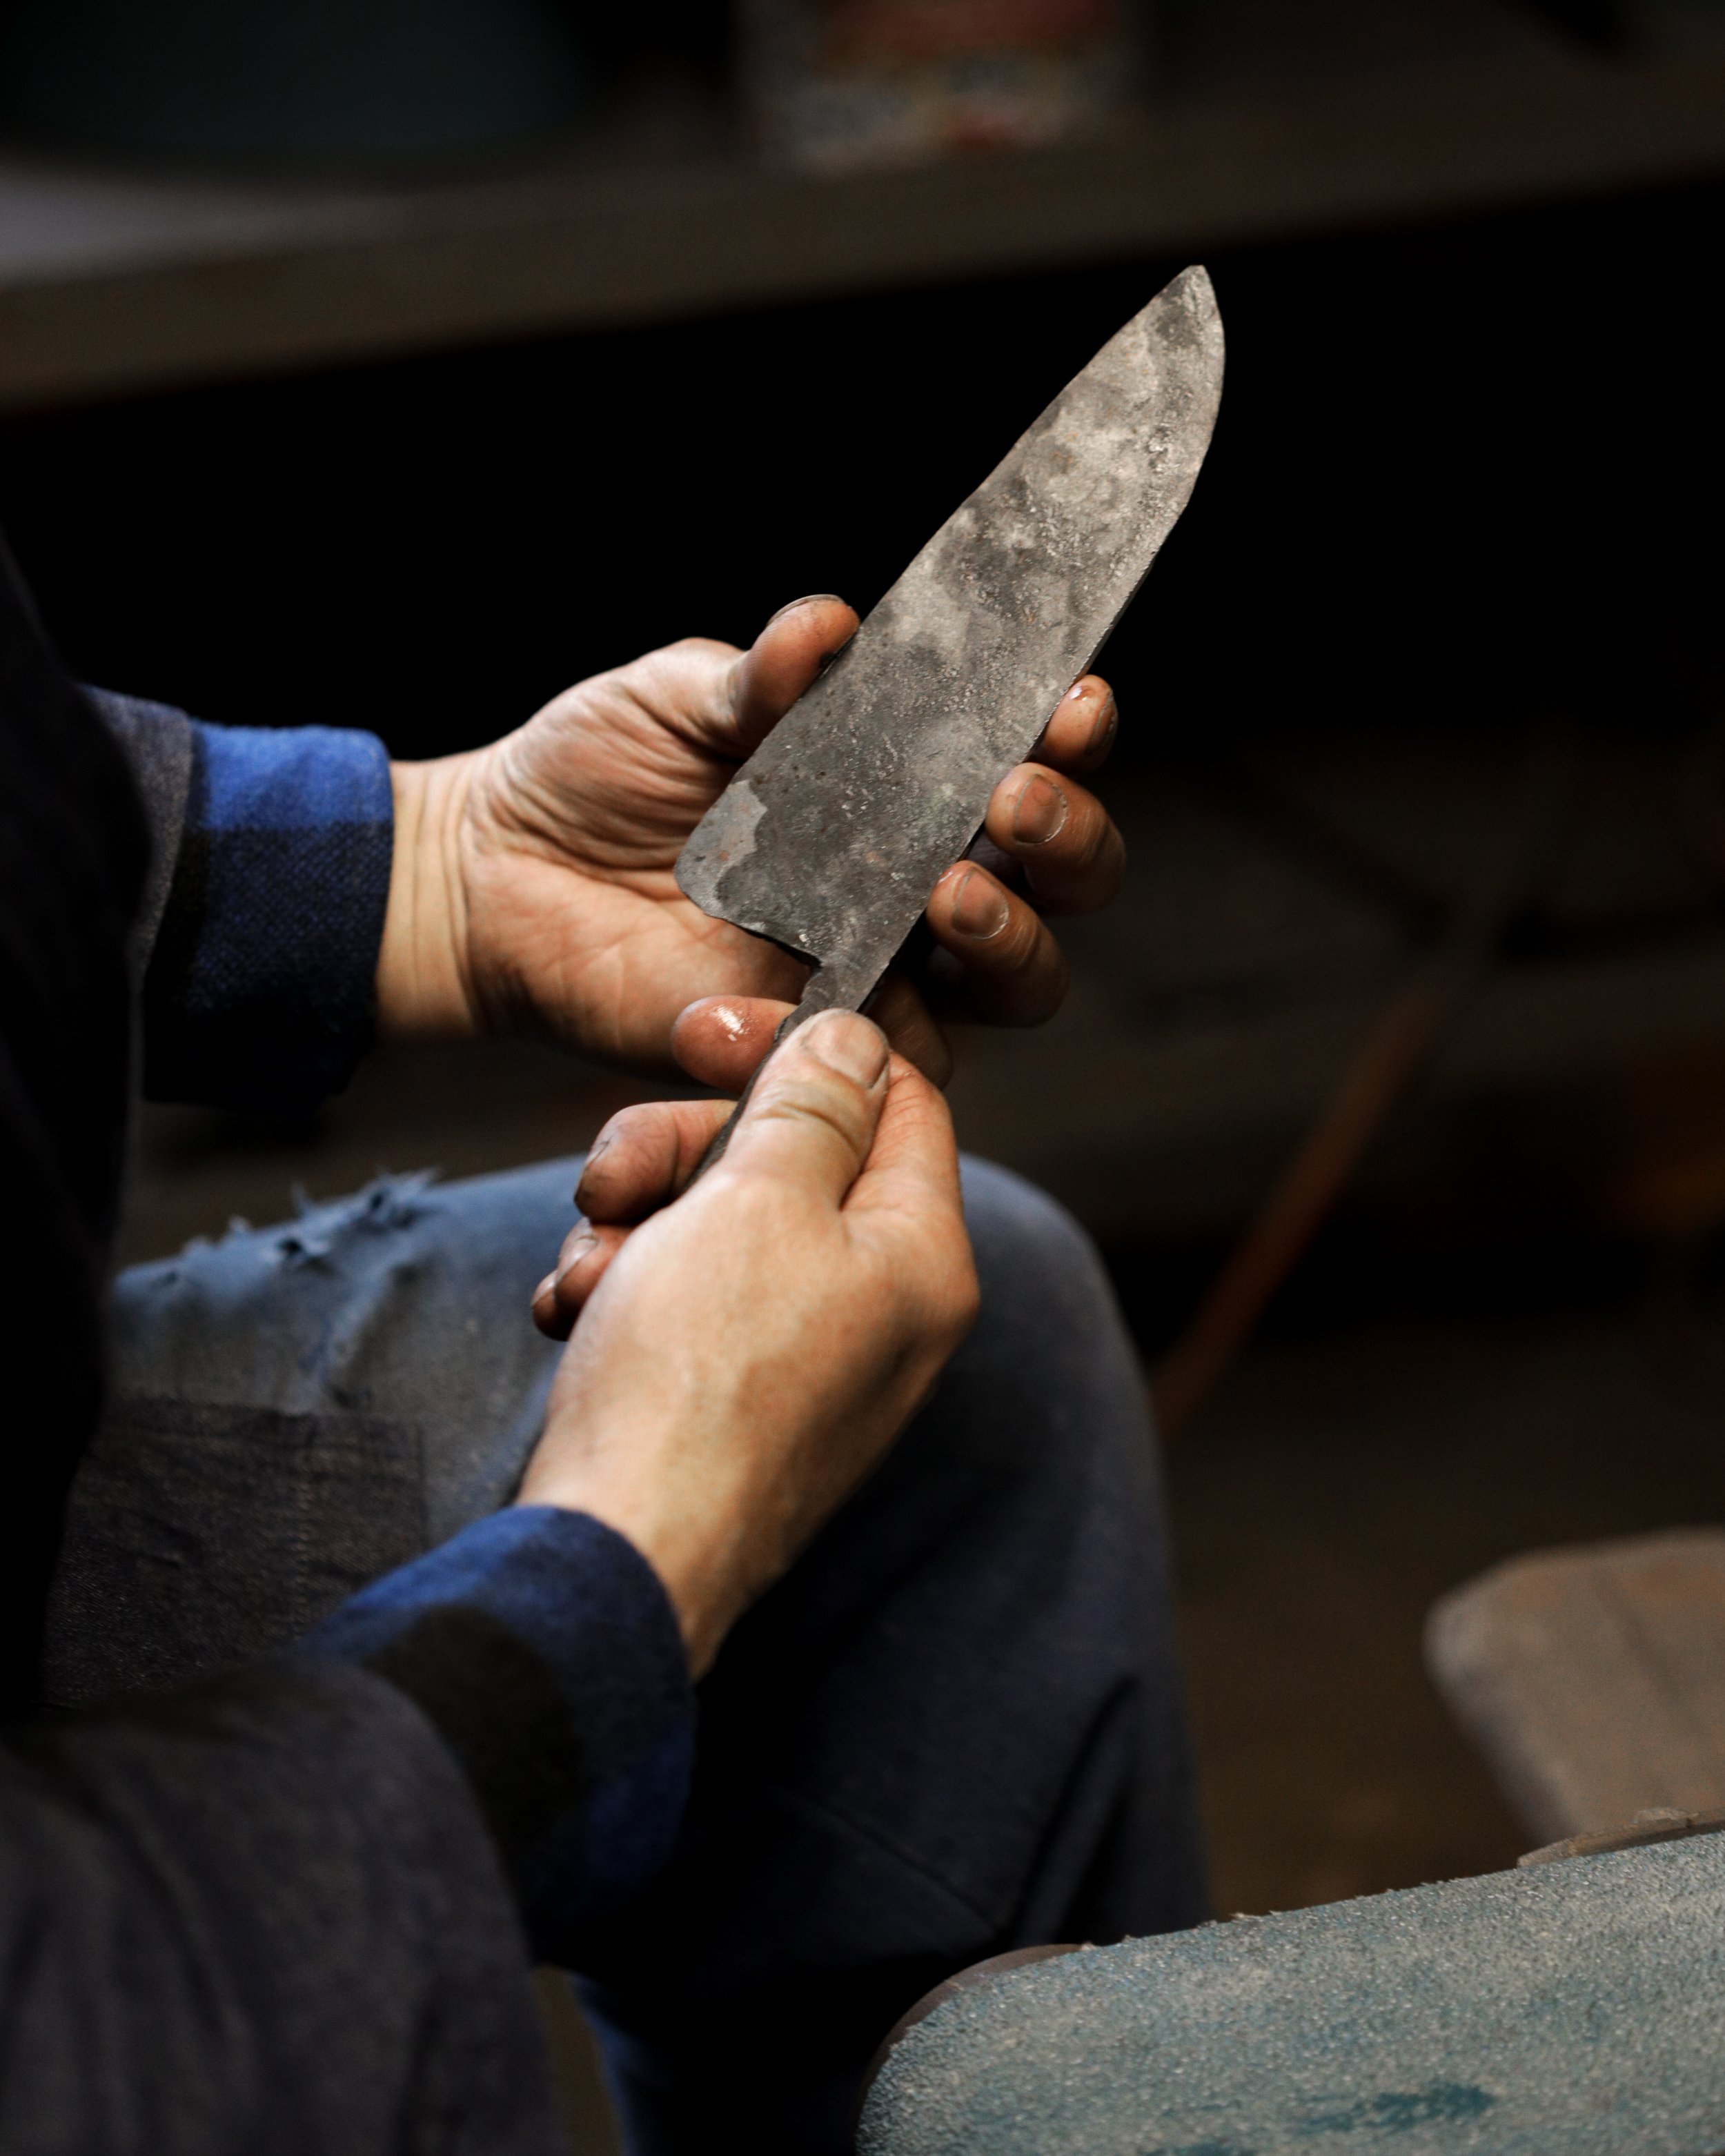
A hammer will only get you so far in pursuit of the perfect shape, especially for unskilled blacksmiths like ourselves. We took the cooled-down metal to the belt sander to refine our blades and created the exact profiles we wanted. The purpose of this step wasn't to sharpen the blade yet but to remove any rough edges and make last adjustments to the shape. This was the only electrical tool we used and it seems it's the only one Nobuya-san uses as well.
Step 5: Hardening the Steel
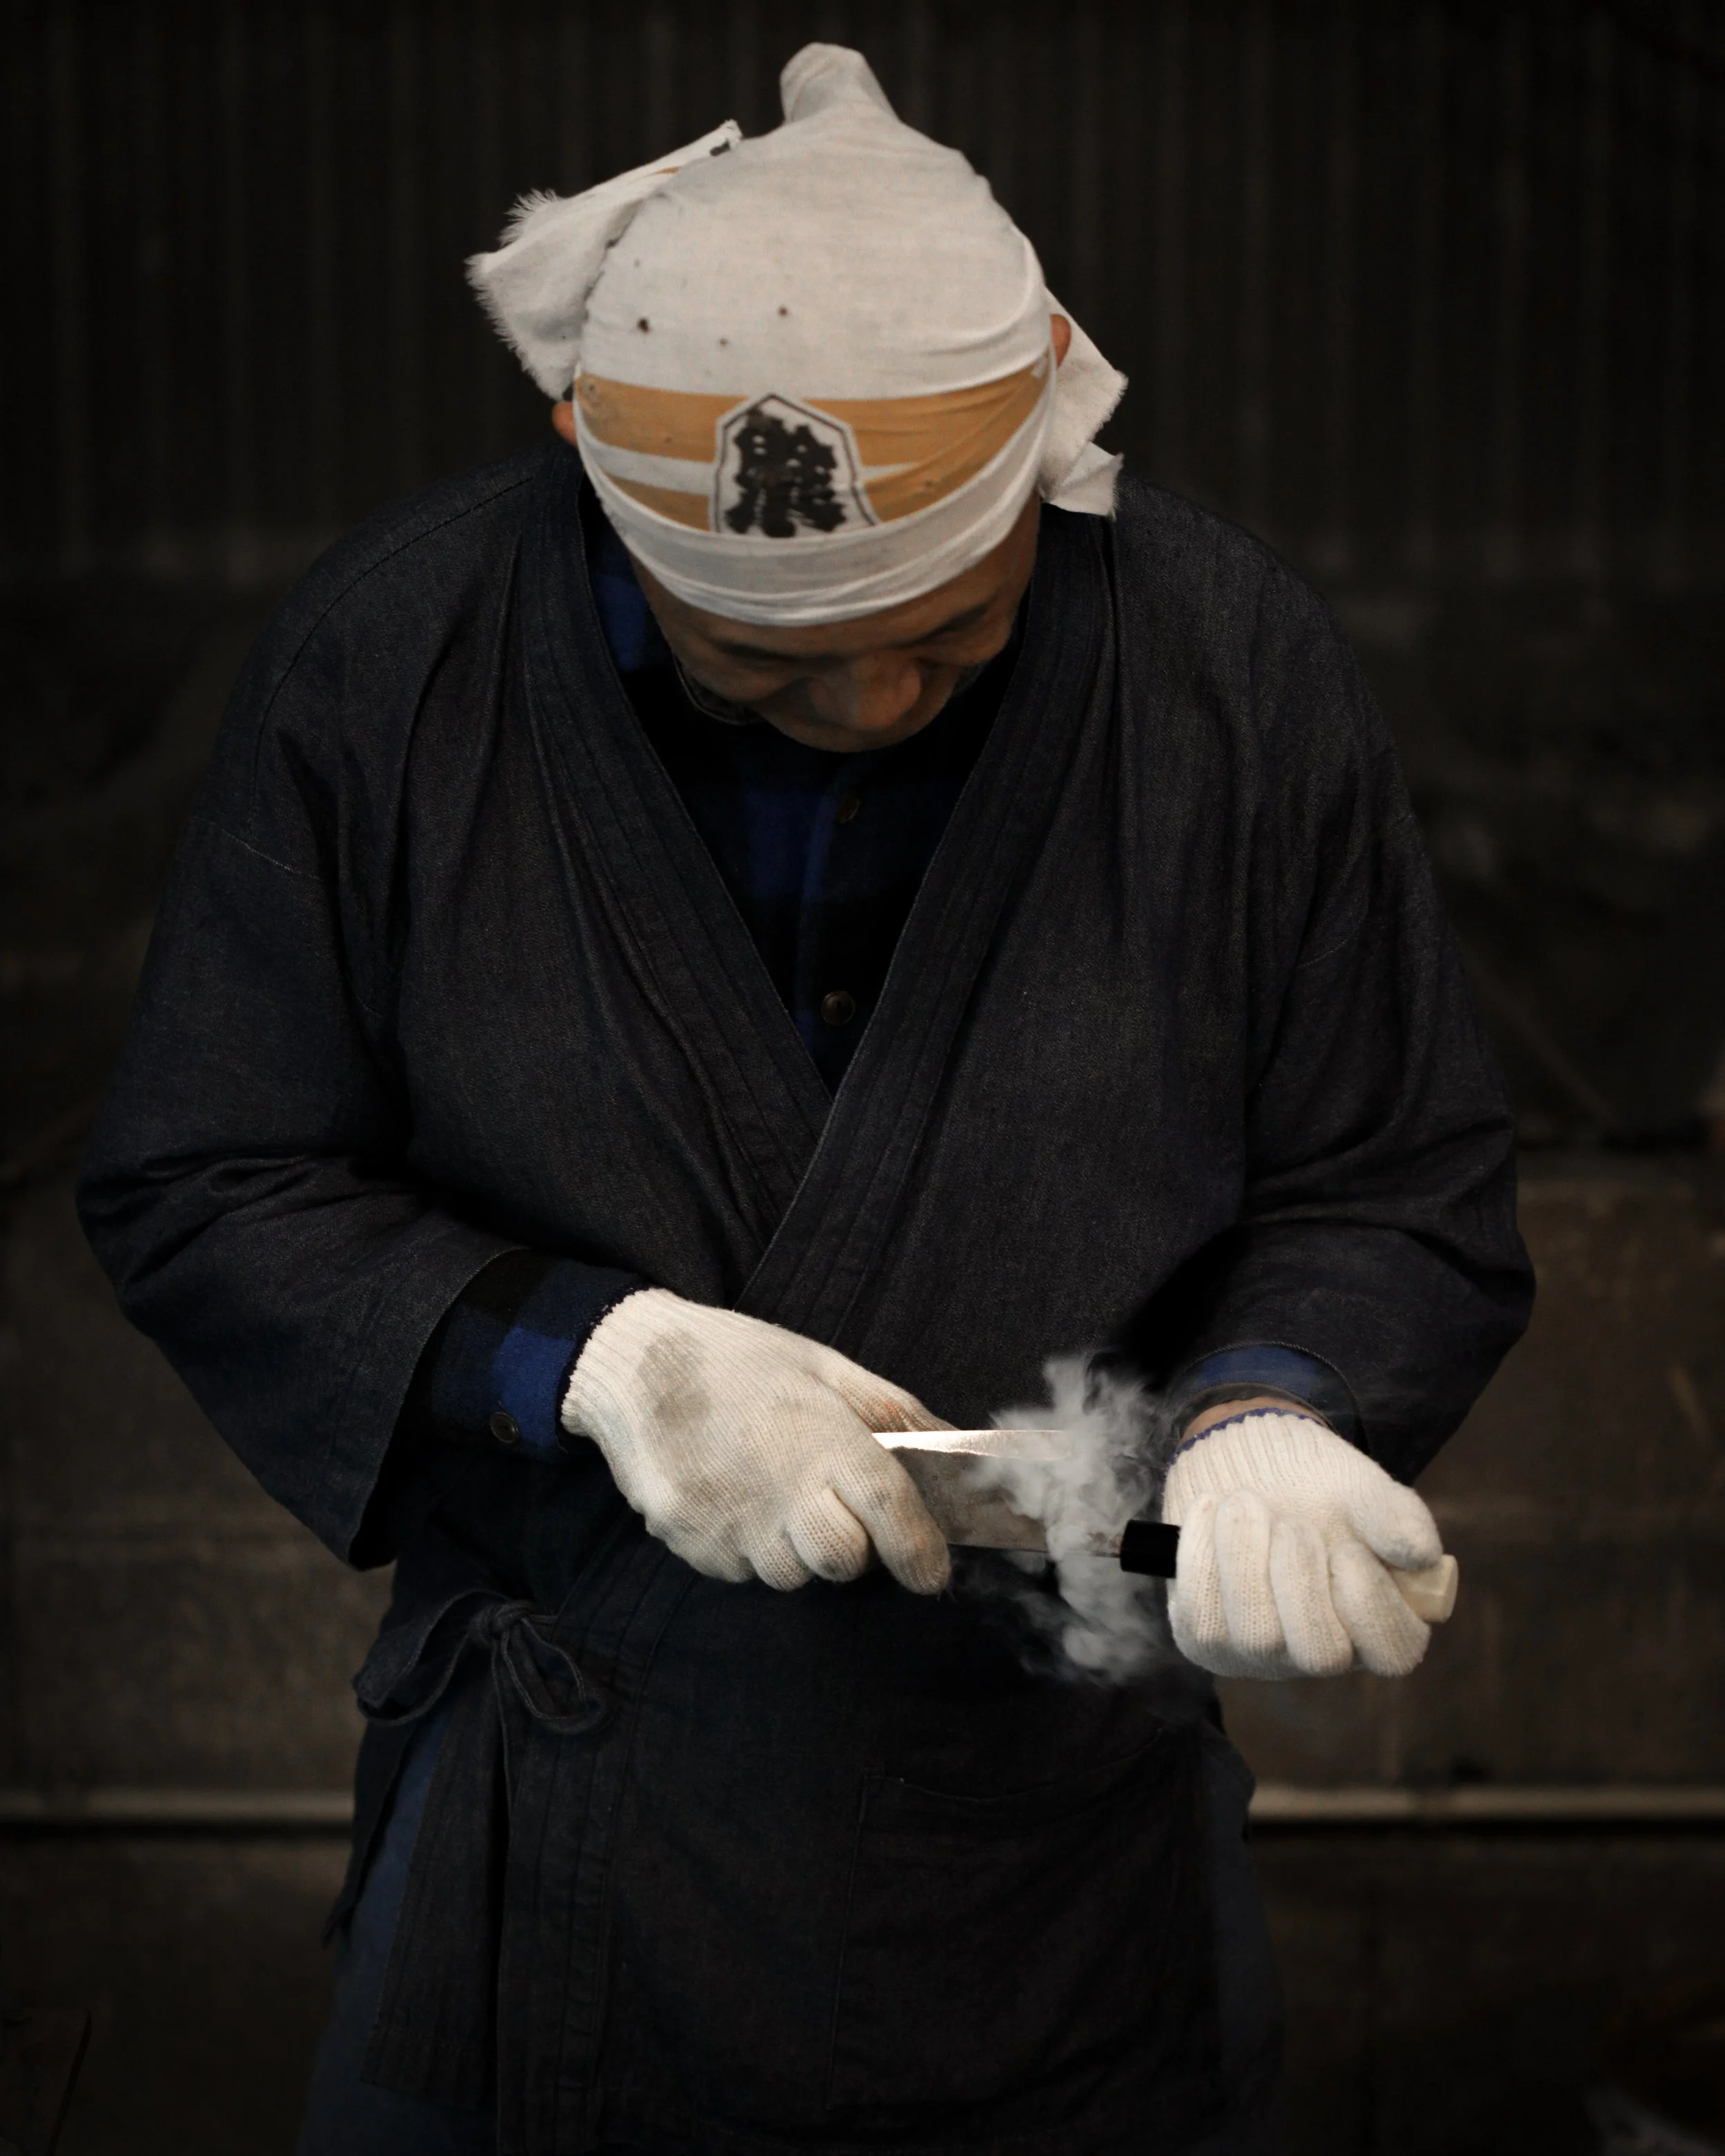
After defining our knife shapes and before giving them their final razor-sharp edges, the steel had to undergo heat treatment. To do this the steel was reheated to around 800C and plunged into water to rapidly cool it. This fast temperature change, known as quenching, causes the crystalline structure of the blade to change into a denser, harder structure. Quenching in water is a traditional Japanese technique and is hardly ever used in the West, as it is very harsh, and the blade can easily crack or warp in the super-fast cooling. Nowadays, oil is often used for this step, as it cools the blade down slower and reduces these risks. Nobuya-san showed us an example of his own doing as a student, with a knife that had come apart along the lines where it was laminated and now resembled more of an outward bend fork than a super-thin knife. He made it clear that timing was crucial, and there was very well a chance of our work not surviving this step. To be able to see the correct color of the heated steel and the cooling of the blade in the water bath, Jesse started covering the windows and turning out all the lights until there was only the furnace and a small lightbulb left to light up the workshop. We each had two trial rounds with a test piece of steel. The goal was to remove the steel from the furnace once it reached 800 degrees. We then quickly plunged it into the water and watched as the air bubble surrounding the blade under the water surface grew smaller, up to the point where it was just about to disappear. At this moment, you had to quickly lift the blade out of the water again. I first removed the steel too slowly, then too quickly, but I was still hoping I would be able to concentrate enough to get it right the final time. To be able to tell if the steel had reached 800 degrees, there was an easy trick; once a magnet wouldn't
Step 6: Tempering the Blade
Tempering is the second part of the heat treatment. It is meant to balance the effects of the quenching and soften the metal a little to reduce its brittleness. This leaves the knife hard enough but reduces the likelihood of the blade cracking or chipping. We slowly reheated our quenched blades back up to 200 degrees to relax the steel. To check for the right temperature of the blade, Nobuya san dropped little droplets of water onto it. Below 100 degrees the water will just splash on the blade. Above 100 degrees, the water will evaporate when coming in contact with the steel. But as soon as the blade has reached over 200 degrees, the water will bounce off the steel in tiny balls. This is the indication that the right temperature was reached. It is really important though to keep testing constantly as once you reach over 200 degrees there is no change in the way the water touched the hot steel.
It is now time to make the last adjustments to the blade in case it warped or bent during the heat treatment. Light taps with the hammer straighten out any movement before the knife is left to cool down slowly.
Step 7: Fitting the Knife-Handle
Japanese knives are typically hidden tang knives, meaning the tang is hidden inside the handle. Traditionally the tang would be friction fit to the wooden handle without using any glue. To achieve a tight fit, the blade's tang is heated up and pushed into the pre-drilled wooden handle. The hot steel burns a perfect fit into the wood. It is important to be careful not to burn too much wood away. Once the blade has cooled it will simply be hit into the handle and sit in place securely.
Step 7: Engraving

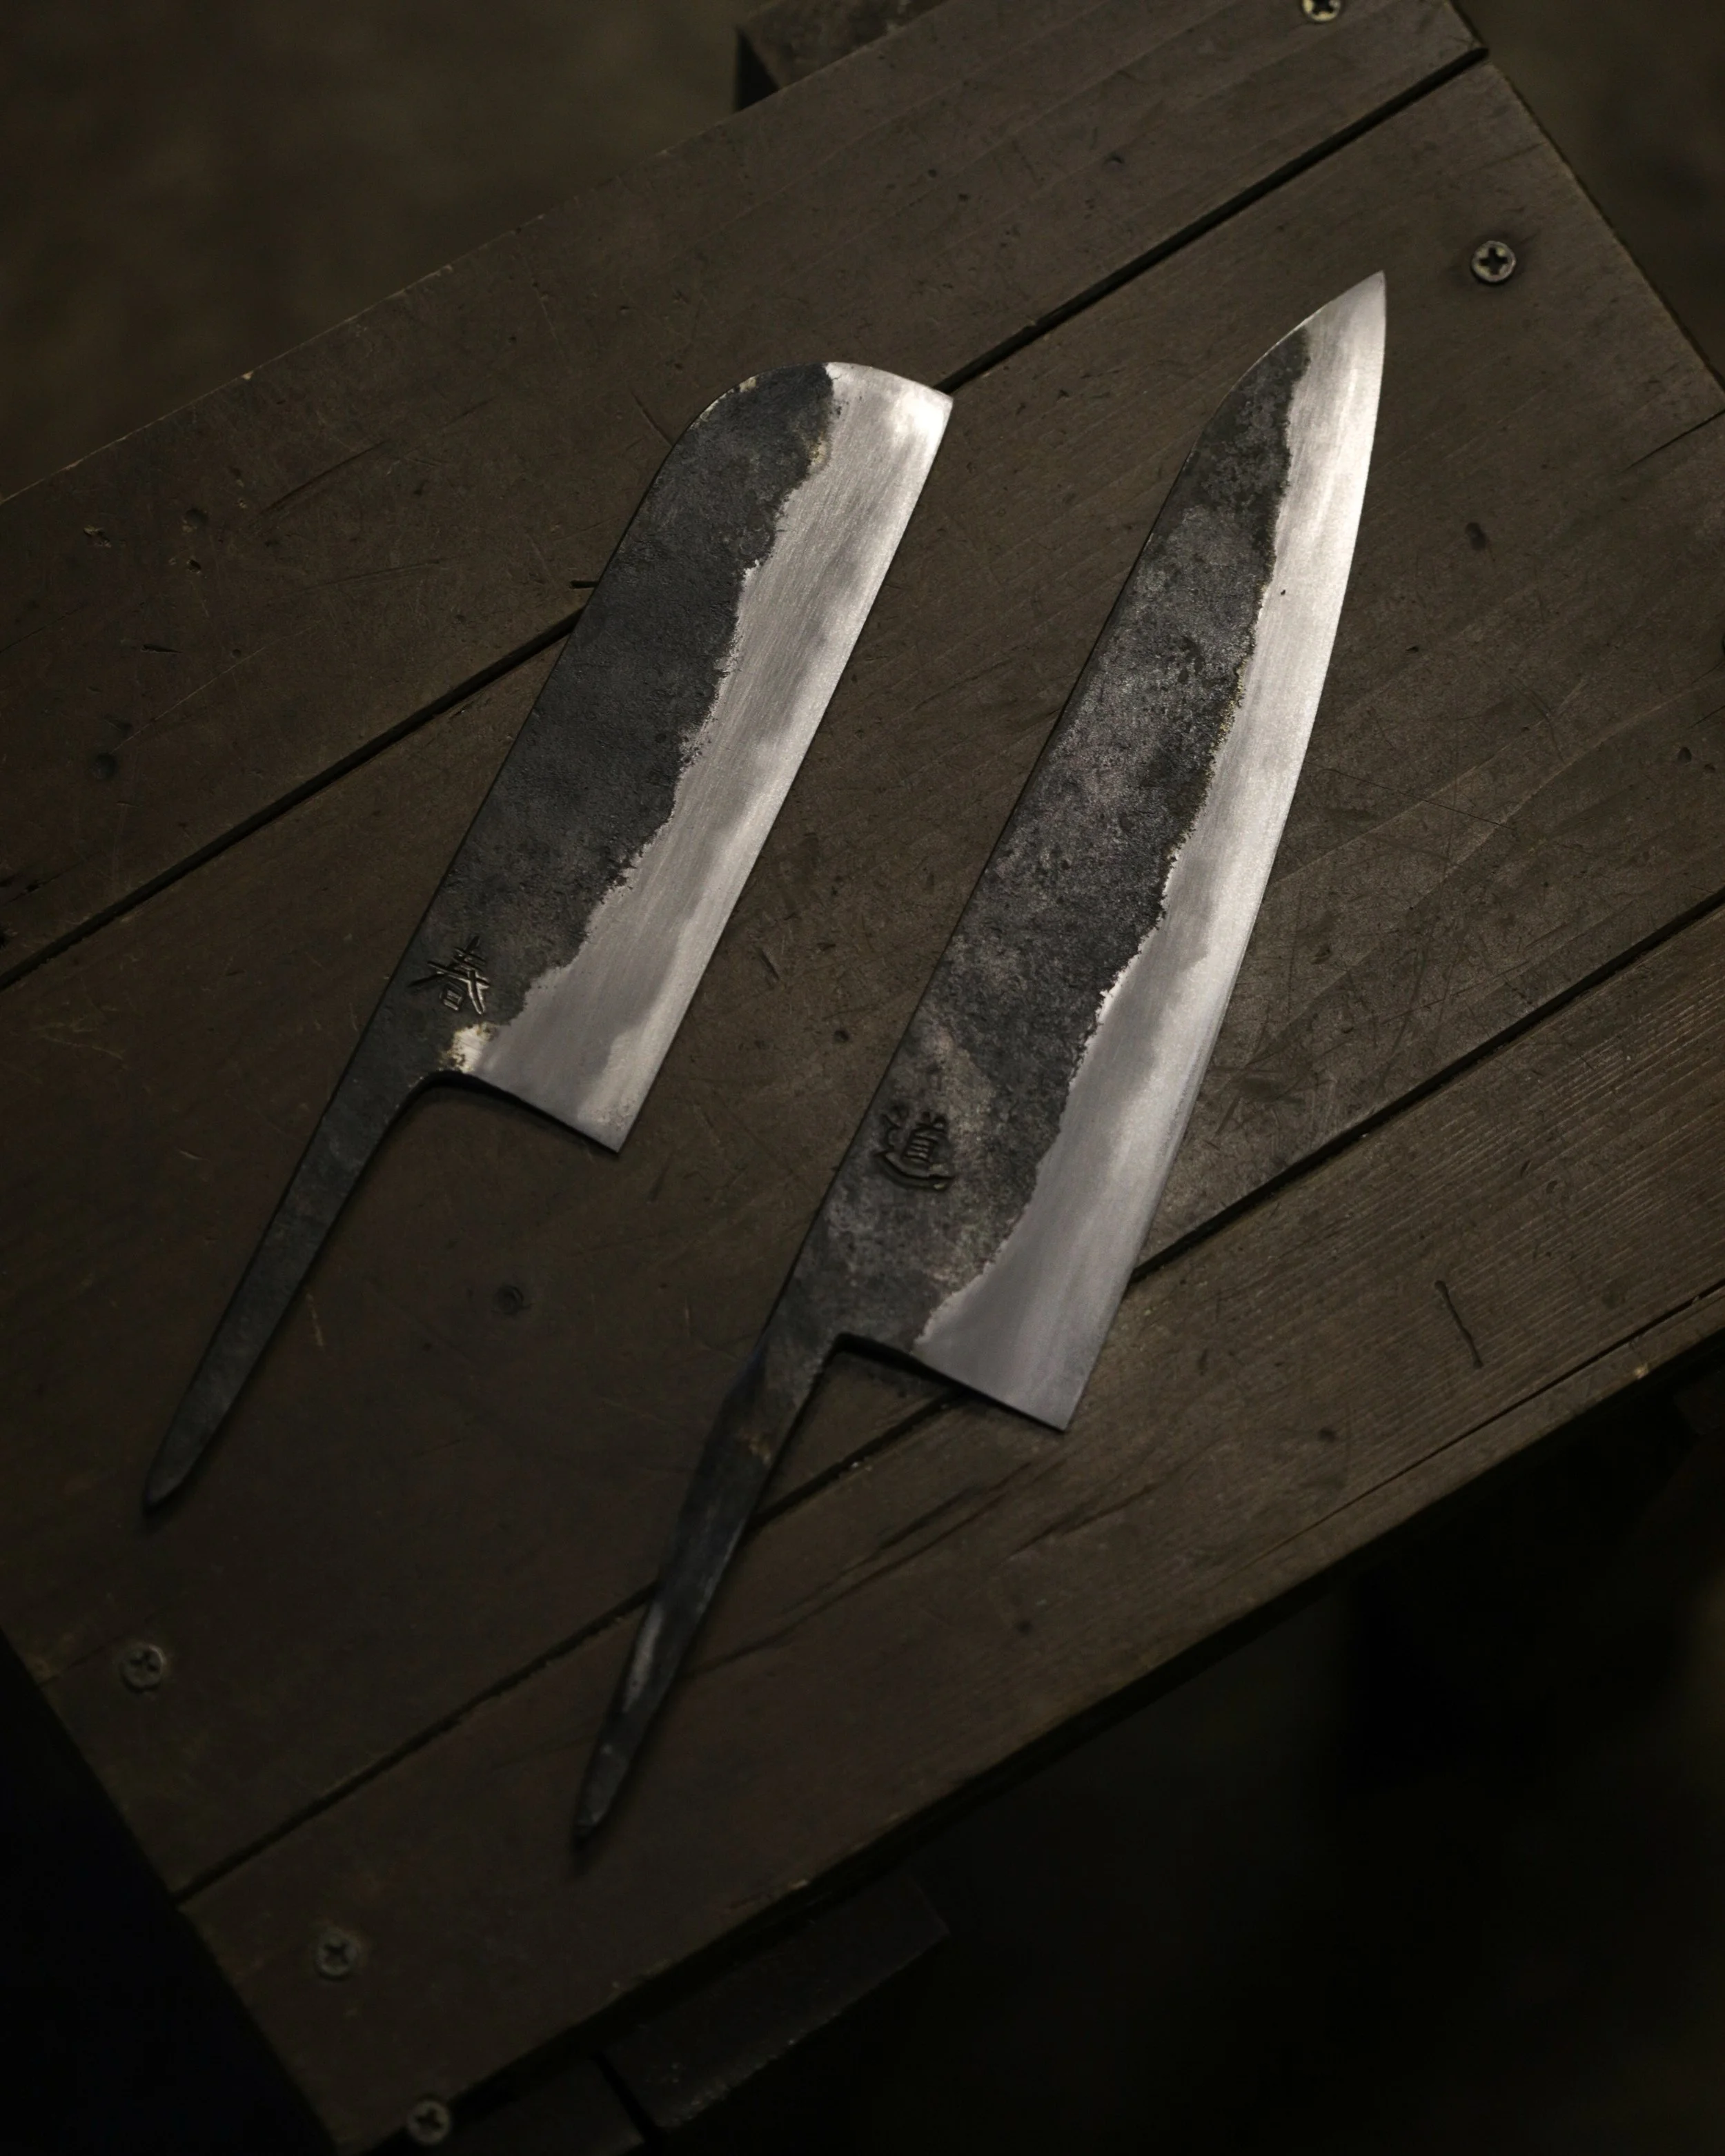
The blade had to be signed by its creator. Nobuya-san gave us a practice piece and helped us pick the Kanji we wanted to engrave. Creating a beautiful-looking Character with the small metal chisel was really difficult and Nobuya-san will happily help you with this step if you don’t feel confident enough to sign your new creation. Ido chose to get his knife engraved with the Character for “journey” or “walking” as we were in the middle of our pilgrimage around Shikoku and I placed the word “Spring” onto mine, as that is the meaning of my name.
Step 9: Sharpen on Whetstones
The sensei was entrusted with the last step; creating the razor-sharp edge that is so famous for a good Japanese knife. Starting on the belt-sander he created the 2 bevels that would taper down toward the cutting edge and then continued sharpening on Japanese water stones.
Now we just needed to take our newly crafted knives home and get them to use!